
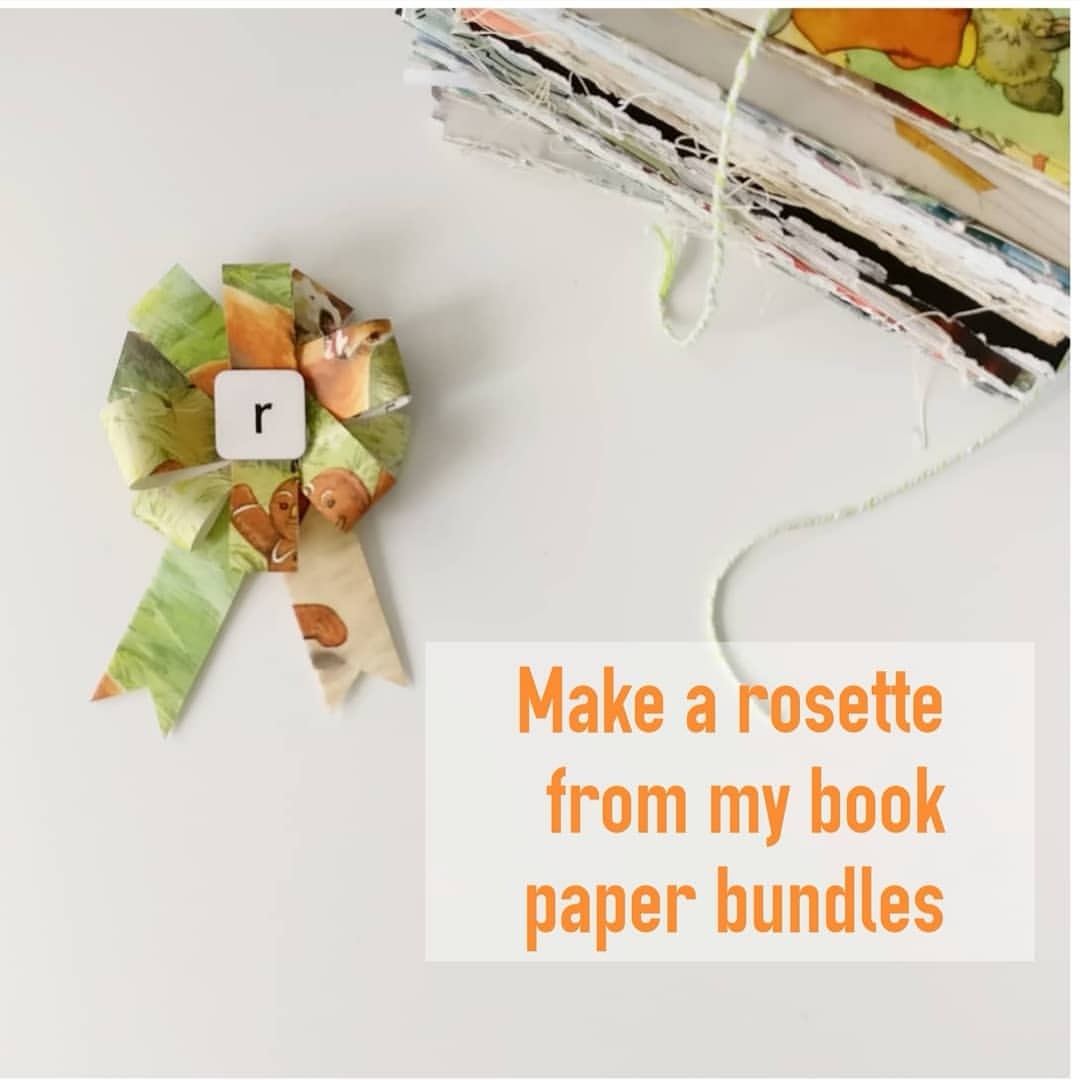
In this simple tutorial I will show you how to make a cute paper rosette. Once you know how, you will be able to make them in a range of materials and sizes for all sorts of occasions!
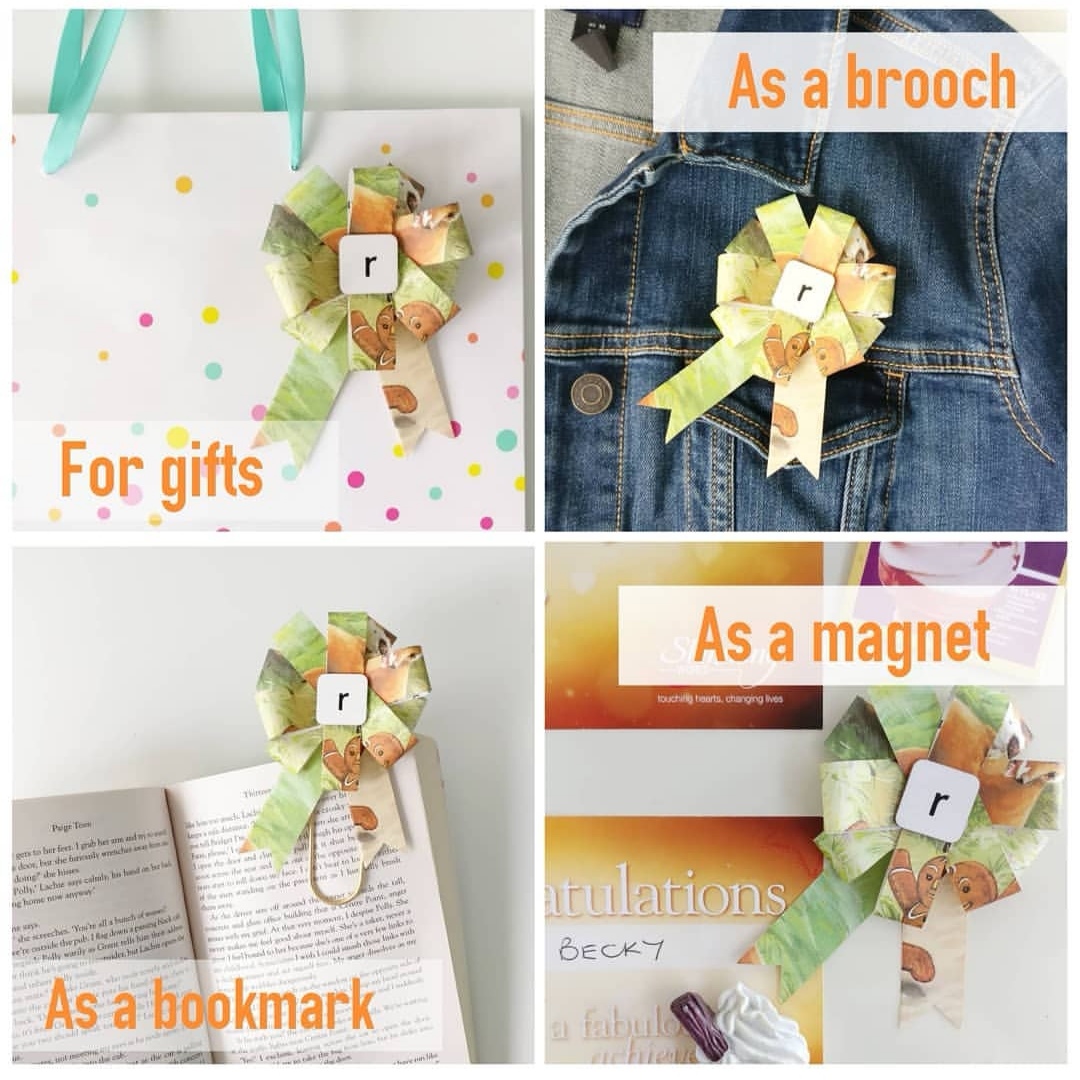
These cute rosettes can be used for a variety of things, I like to use in gift wrapping but here are some other ideas:
Get all your equipment together:
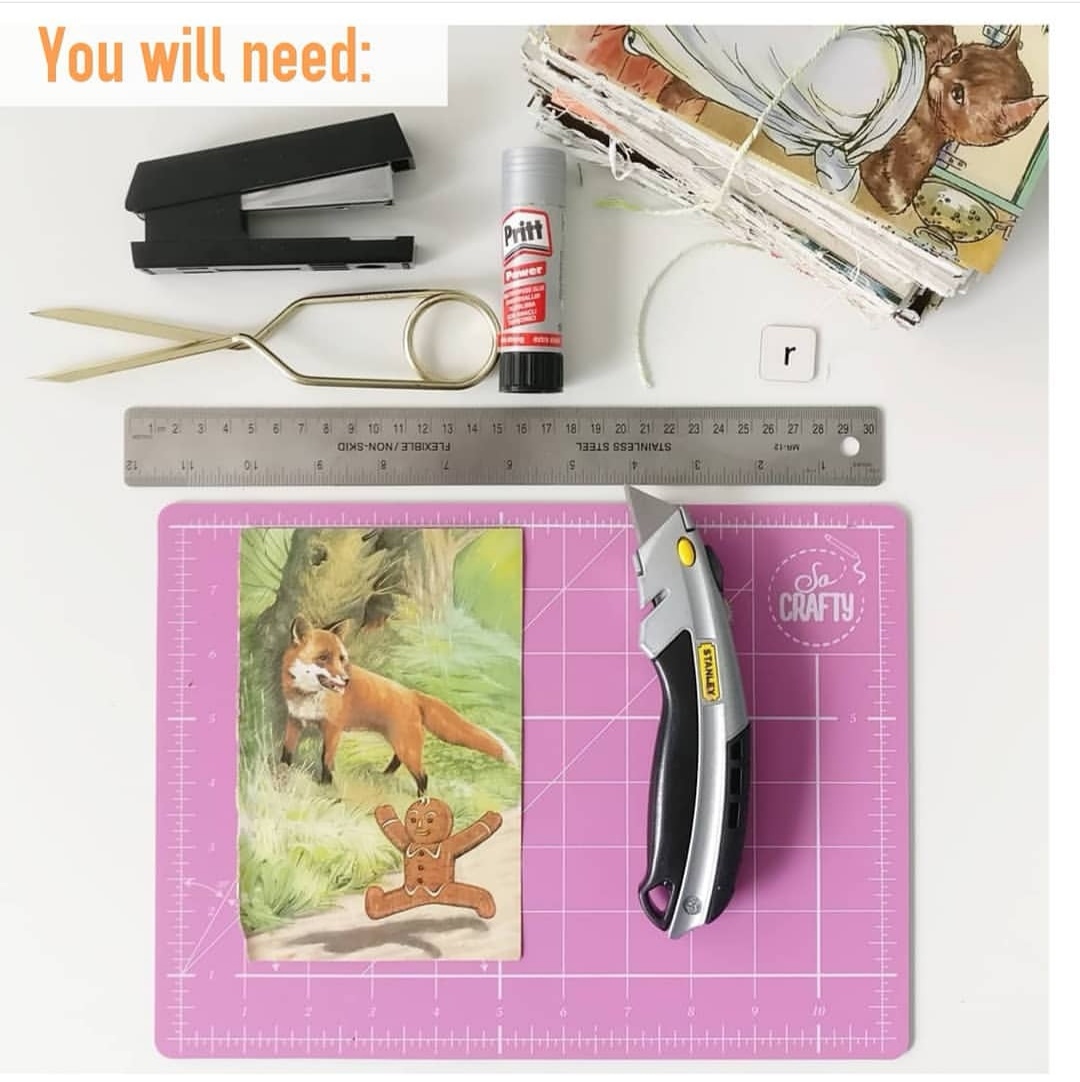
You will need paper, knife, ruler, cutting mat, glue, scissors and a stapler plus anything else you’d like to use as an attachment e.g. safety pin, magnet, hair clip etc…
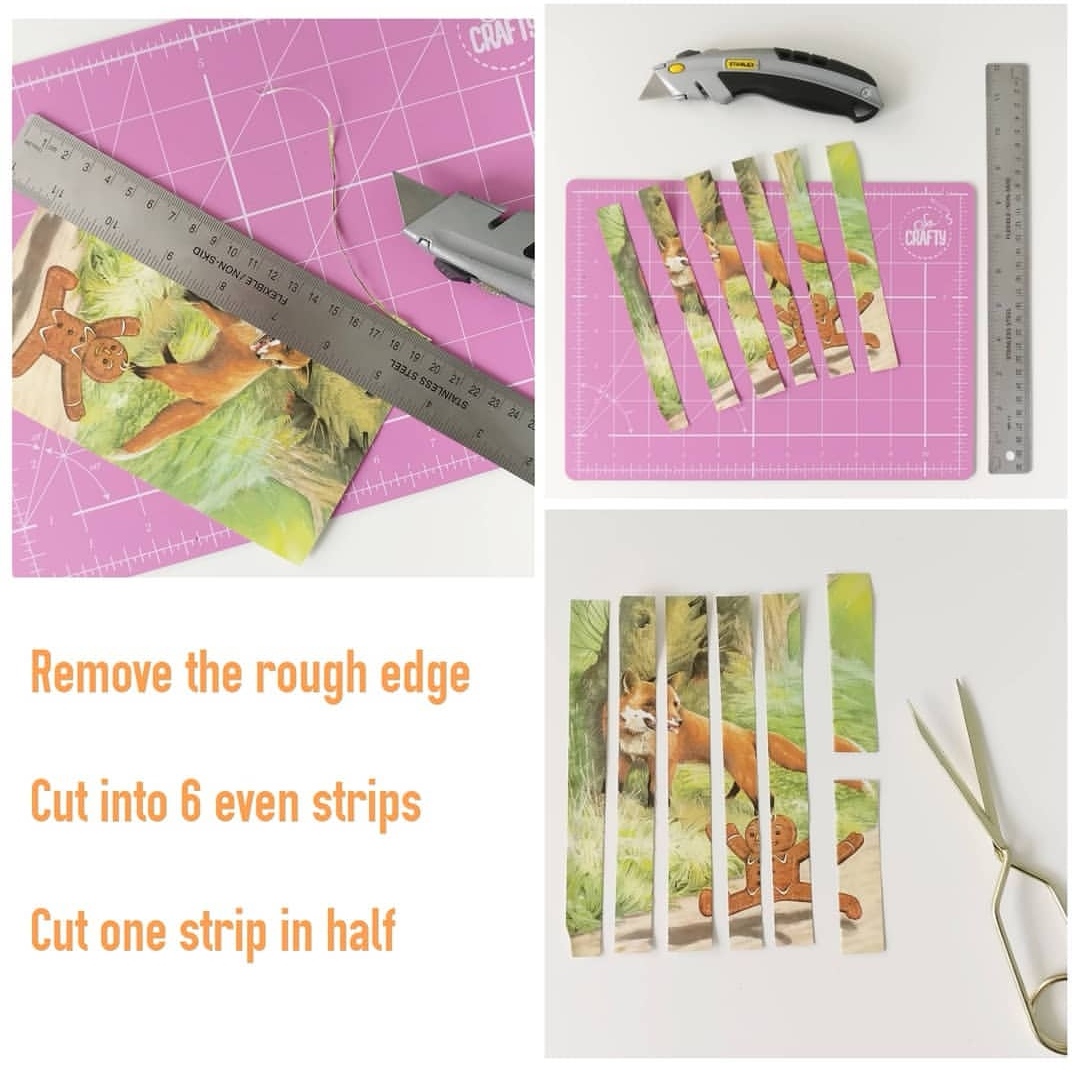
You should have 5 big strips and two small strips – these measure 1cm x 17cm and 1cm x 8.5cm
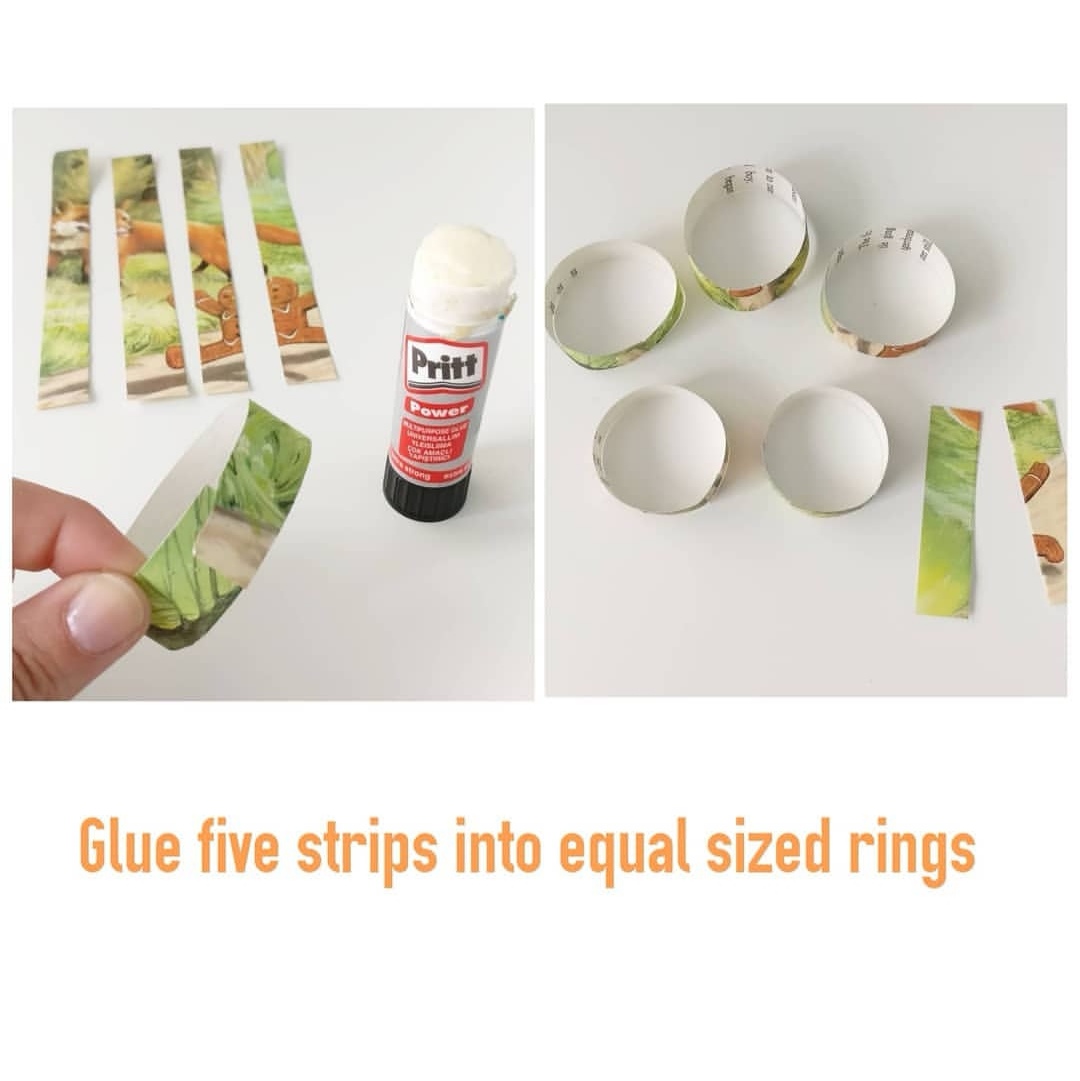
Glue the five long strips into rings with about a 5- 8mm overlap – try to keep them all the same size.
Now comes the fiddly bit. For your first time you may find it easier to pop a little bit of glue inside the circles to create the figure of 8 shapes and then layer them (with practice you won’t need to do this)
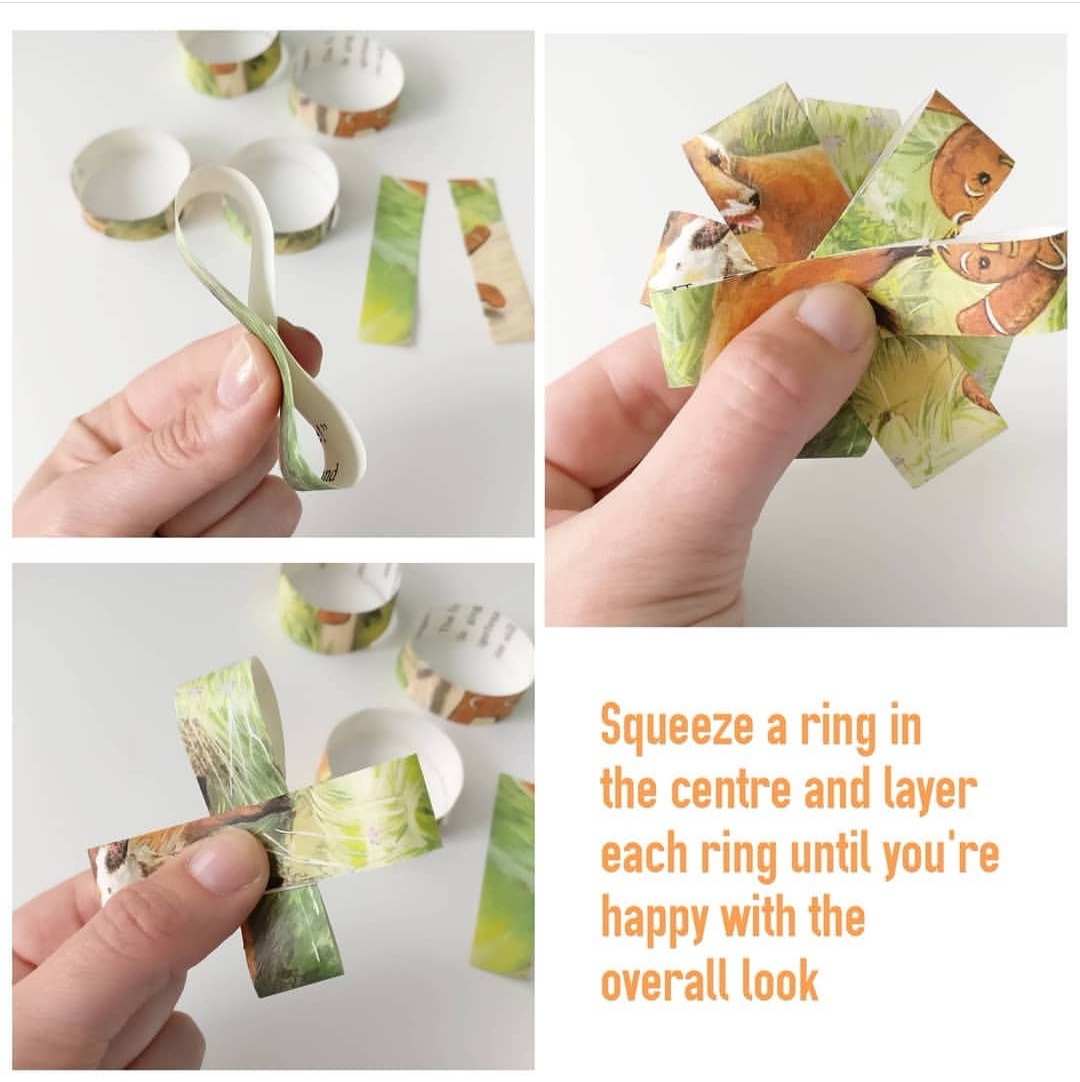
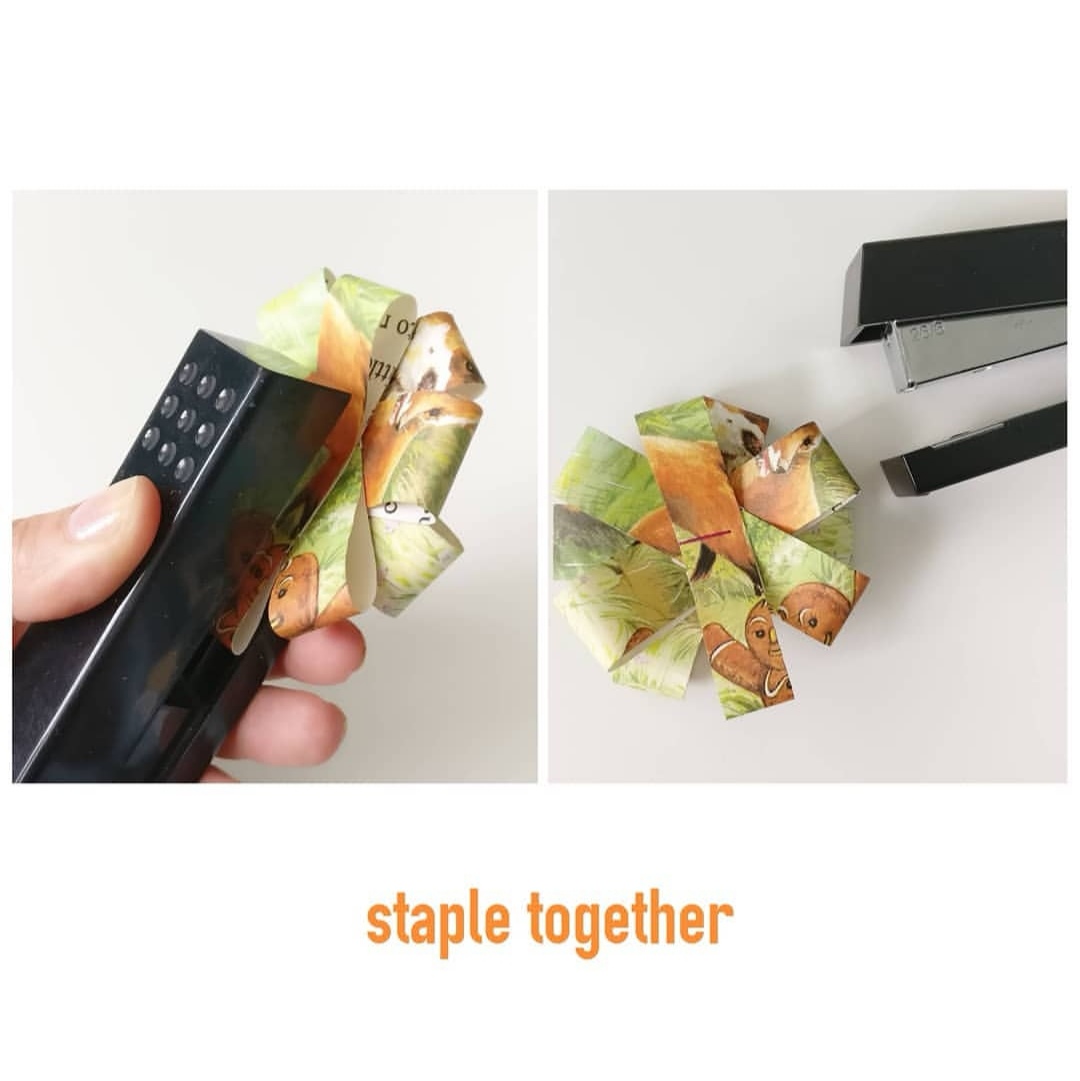
With all the 5 circles layered pop a staple through them to hold them in place – try and aim for the centre as best as possible. (We will be covering the staple up!)
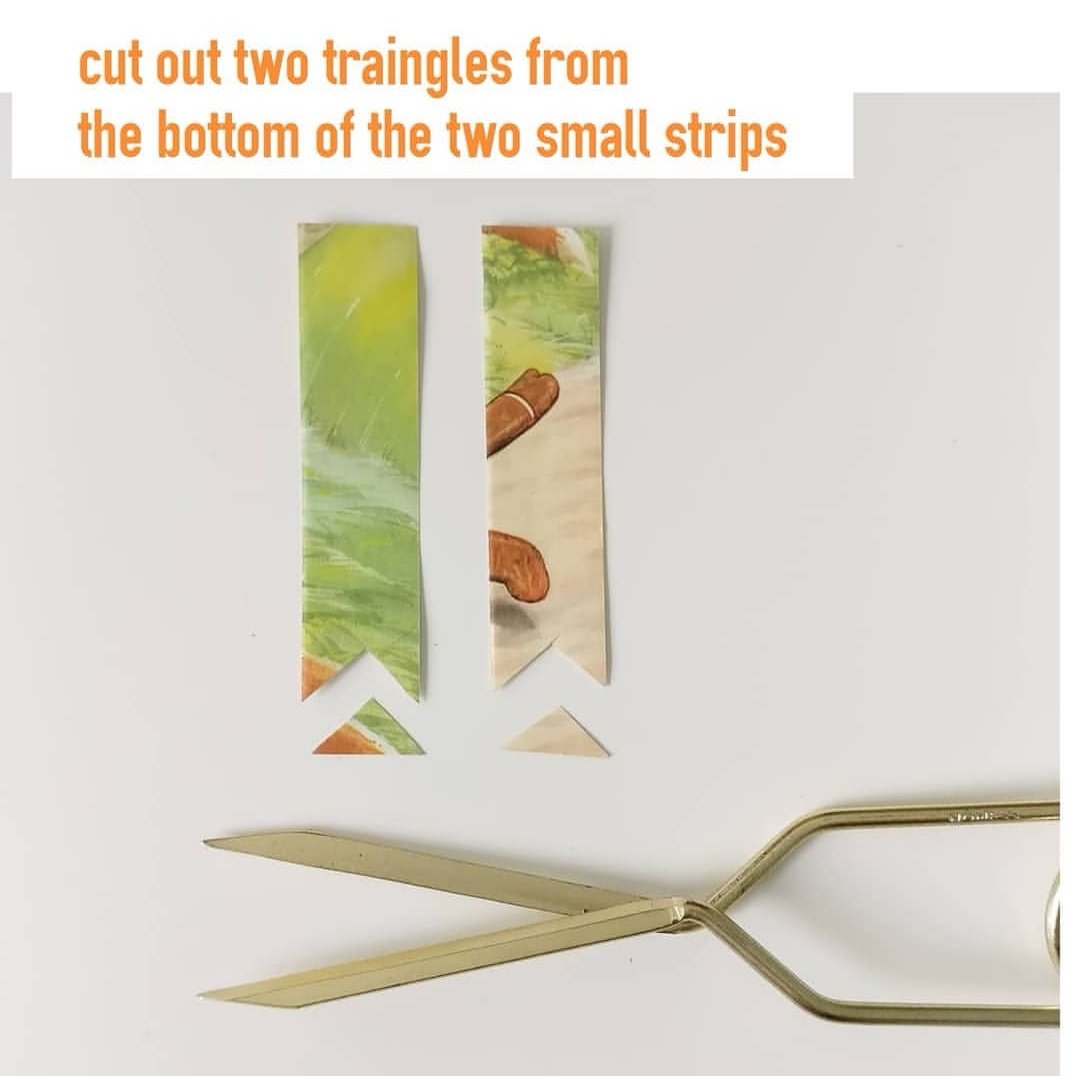
Try and make the triangles as symmetrical as possible. If using ribbon I would suggest folding the ribbon in half and cutting a diagonal line from crease to corner to create the perfect notch, but you don’t want to do that when using paper as you’ll see the crease!
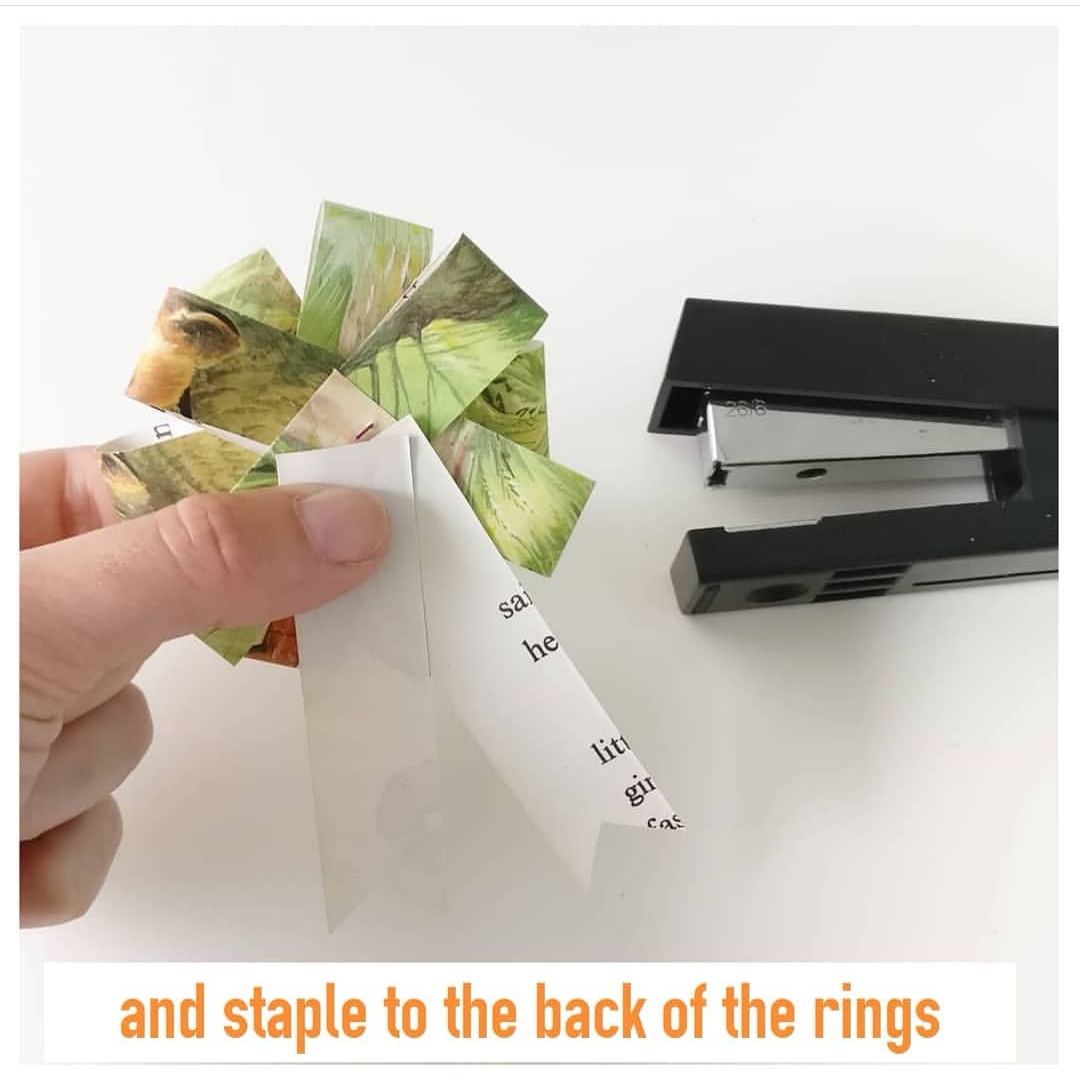
You could glue them but stapling makes them more secure.
Hide the staples with a button or something decorative like a scrabble letter like I’ve used here – a cute way of personalising a gift!

I hope you’ve enjoyed this tutorial – if you have a go at making one please share on your social media and tag me @retrofromscratch so I can see it!
Remember you don’t have to use vintage paper to make your rosette – why not recycle some old restaurant menus or unwanted flyers? An old magazine? Or even newspaper? You can make them from ribbon too, just remember to replace the stapler with glue – I recommend Bostick All Purpose Glue
If you have any questions please ask! Happy crafting!
Becky x
