Uncategorized

Prolong the life of your notebook with my 5 top tips!

“I don’t want to ruin it, it’s too nice!” Anyone else feel like this about using their notebooks?! I know I have! But as lovely as your notebook may be, they are there to serve a purpose and we should use them! To get the most out of your notebooks and prevent damage, here are my top 5 tips on caring for your books.

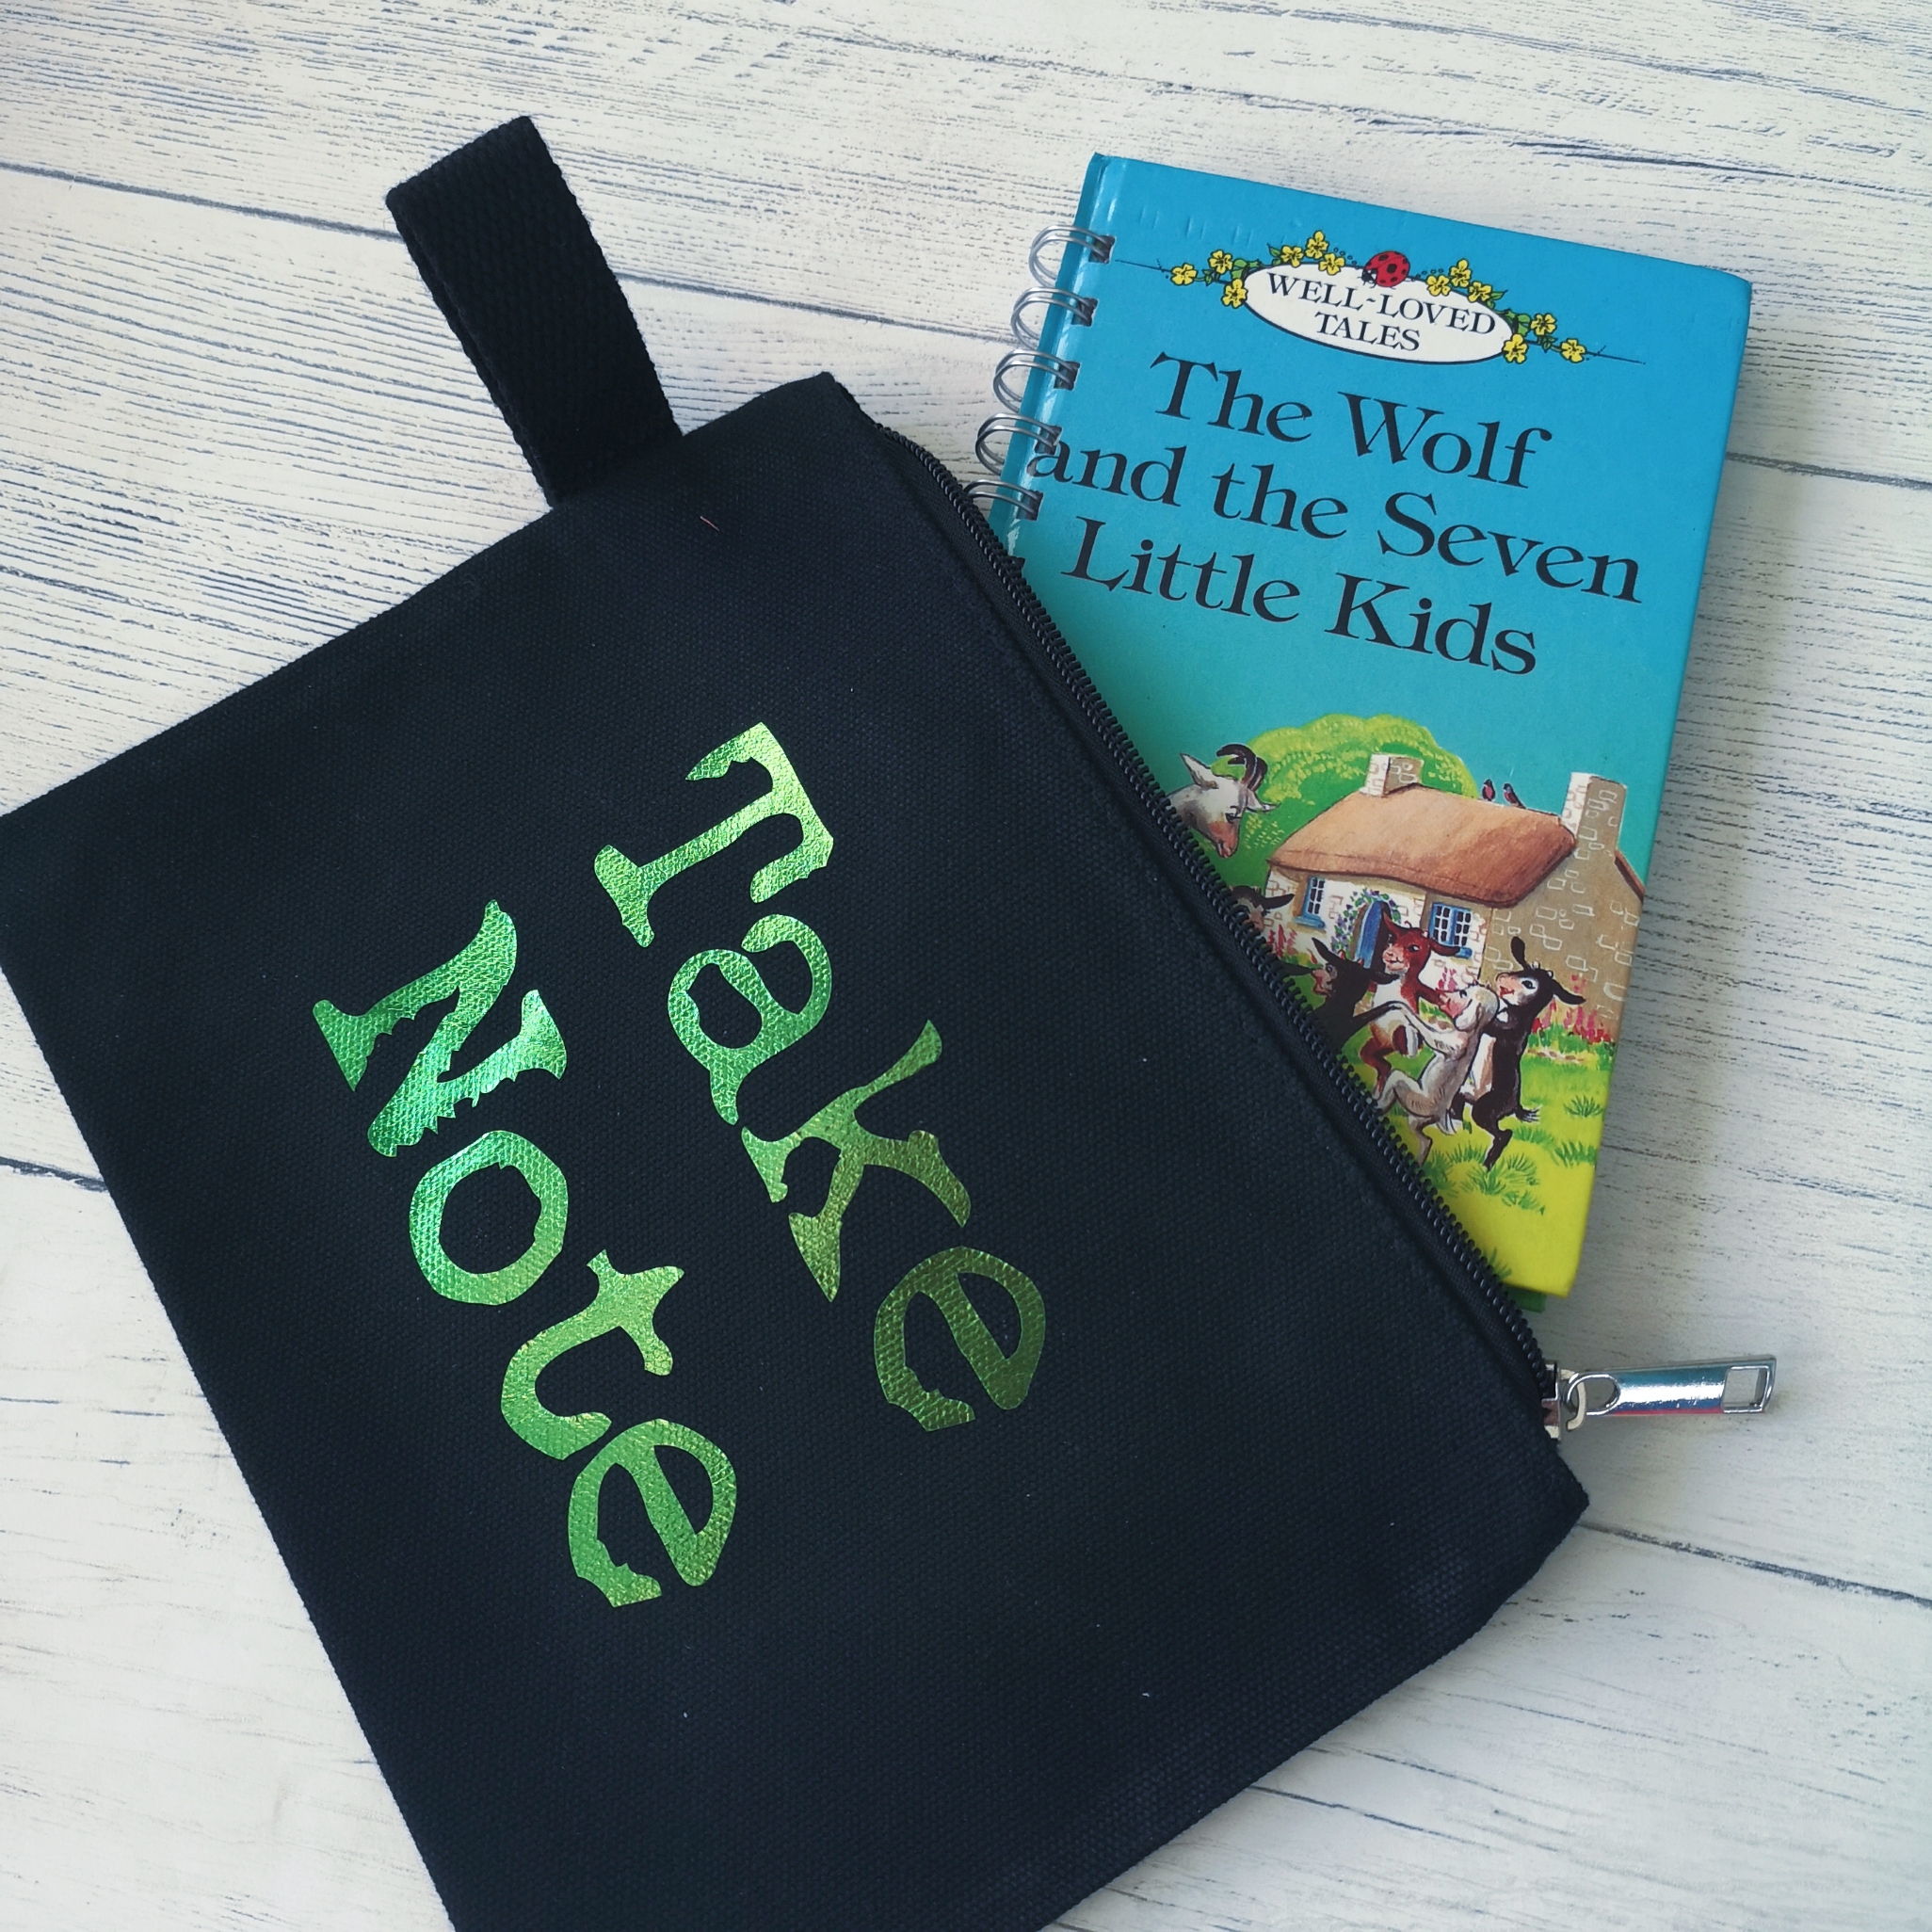
1. Pop your notebook in a book pouch.

A pouch will protect your notebook from the other contents of your bag. I purchased a canvas bag and personalised it with an appropriate phrase in my Retro from Scratch font! You can buy book pouches online or you make one easily yourself – there are plenty of tutorials out there. Or maybe I should start supplying them in my shop?

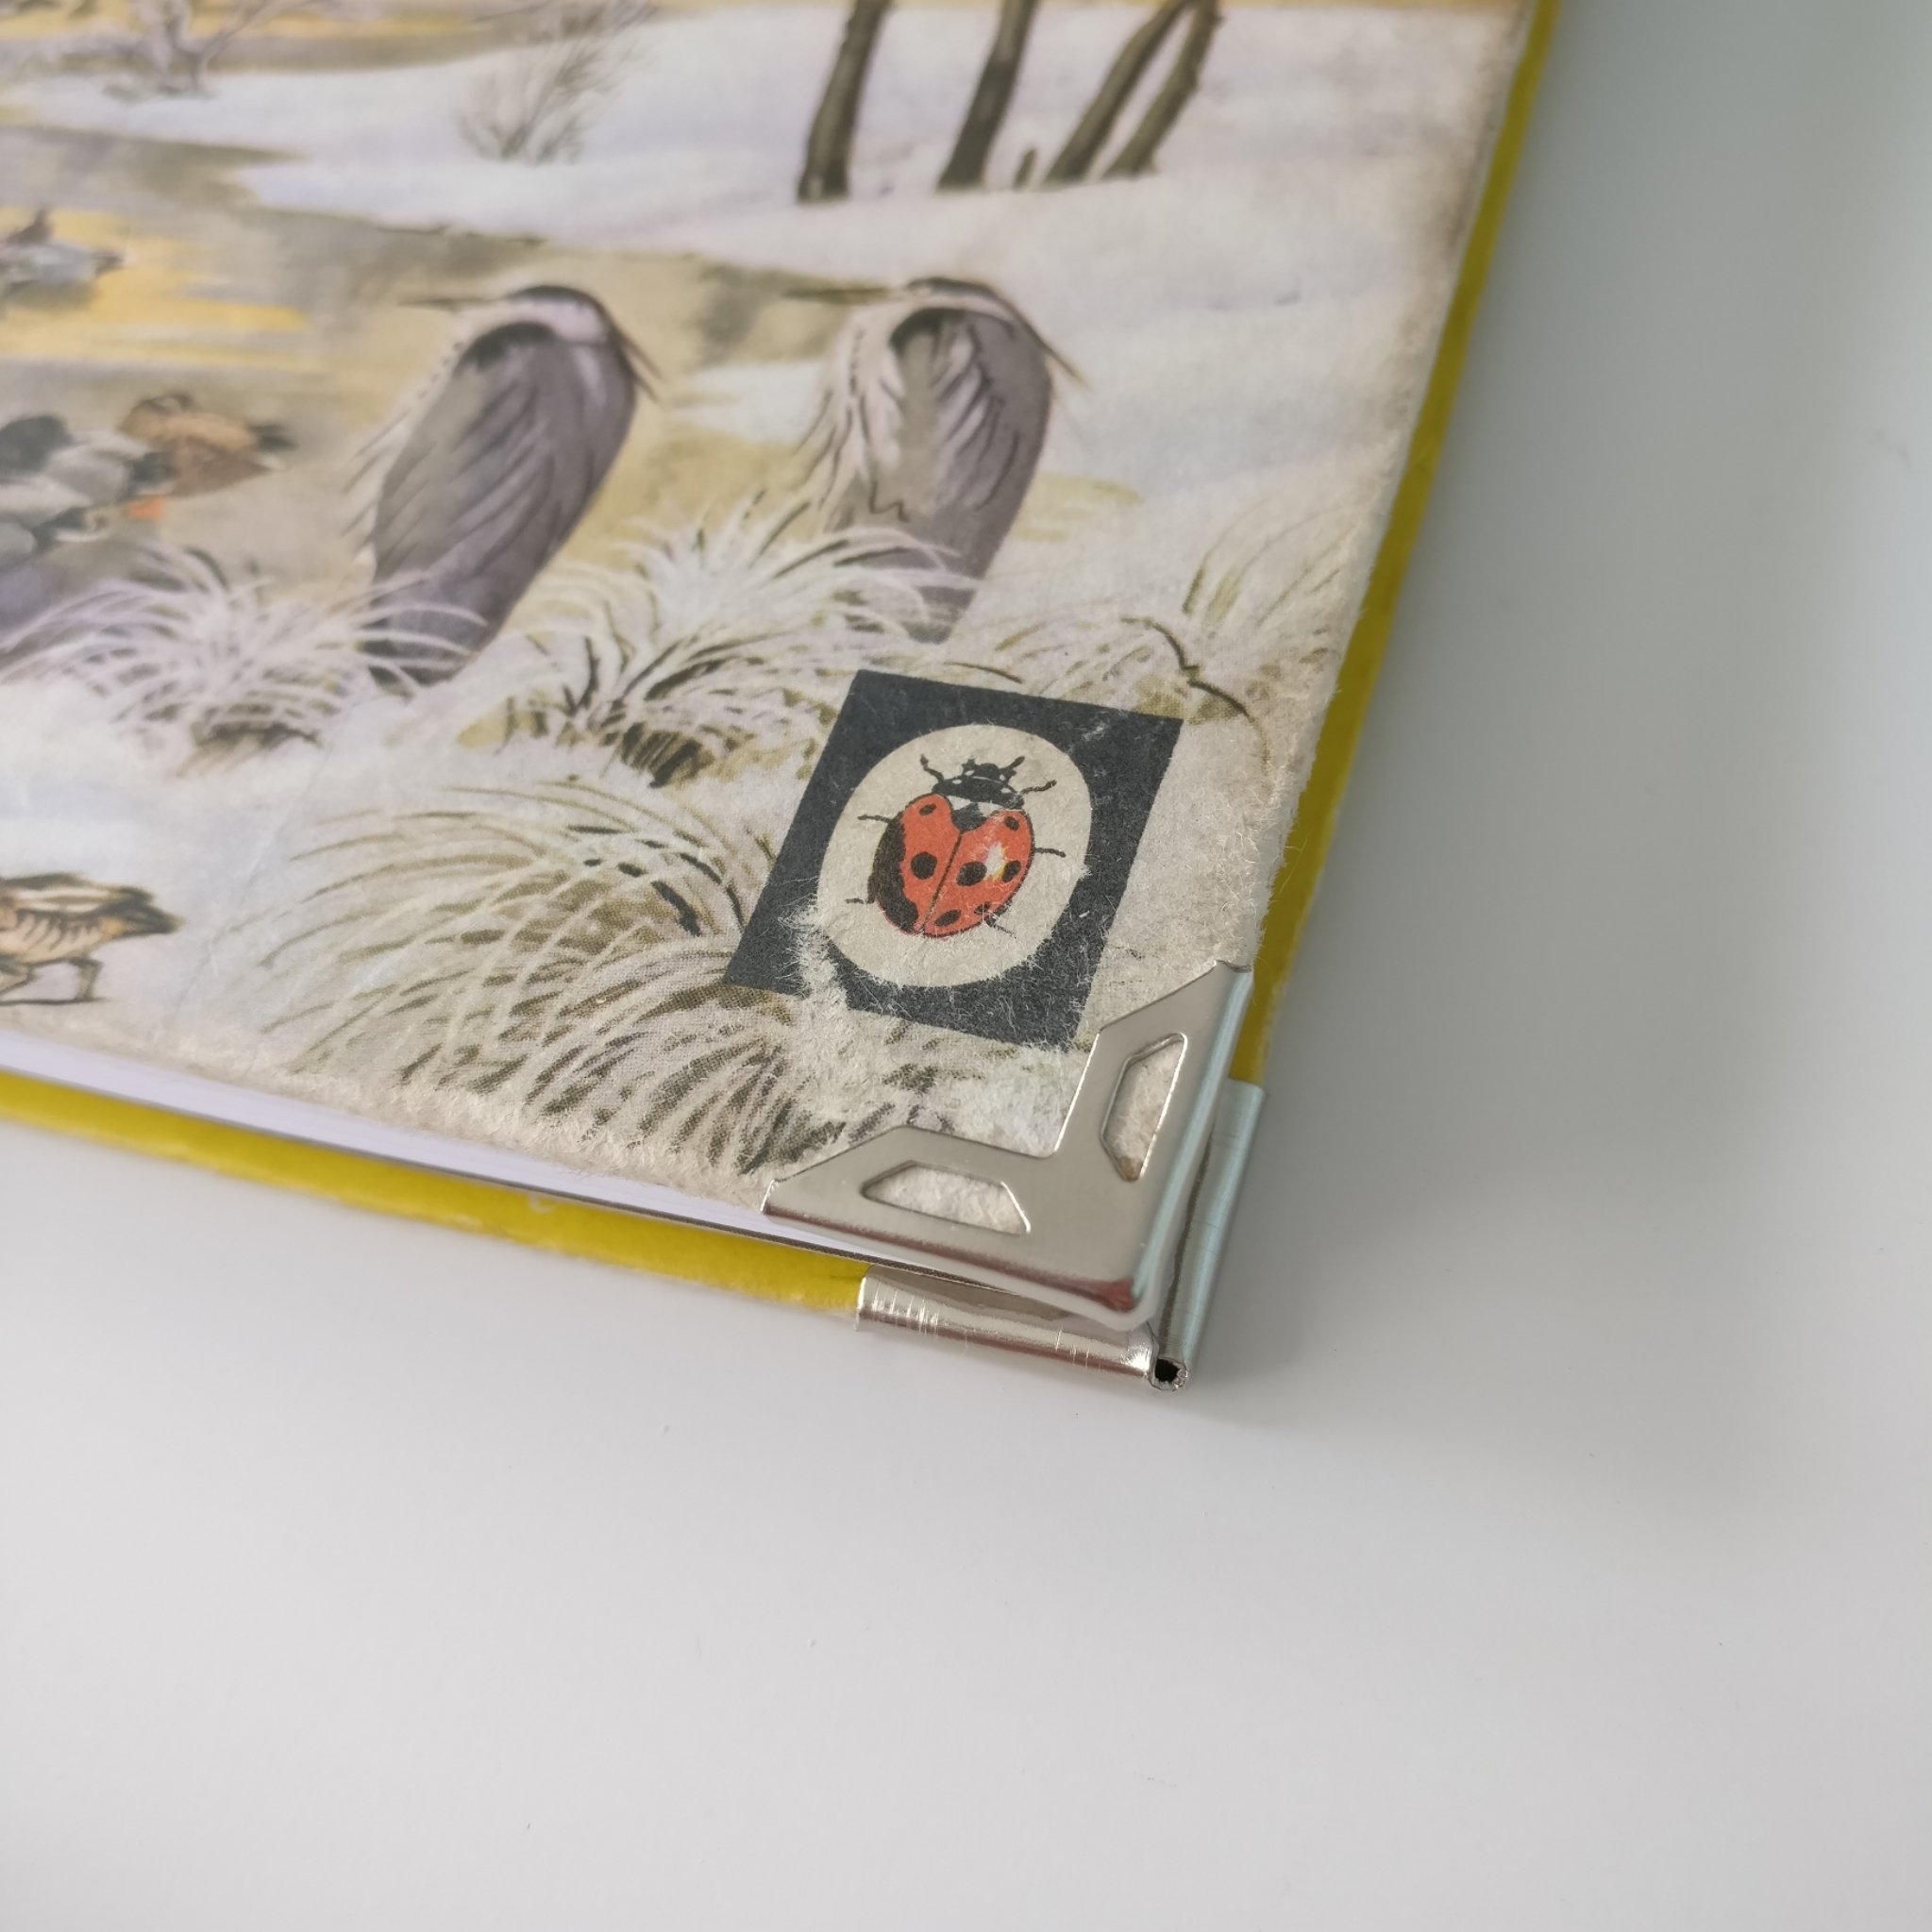
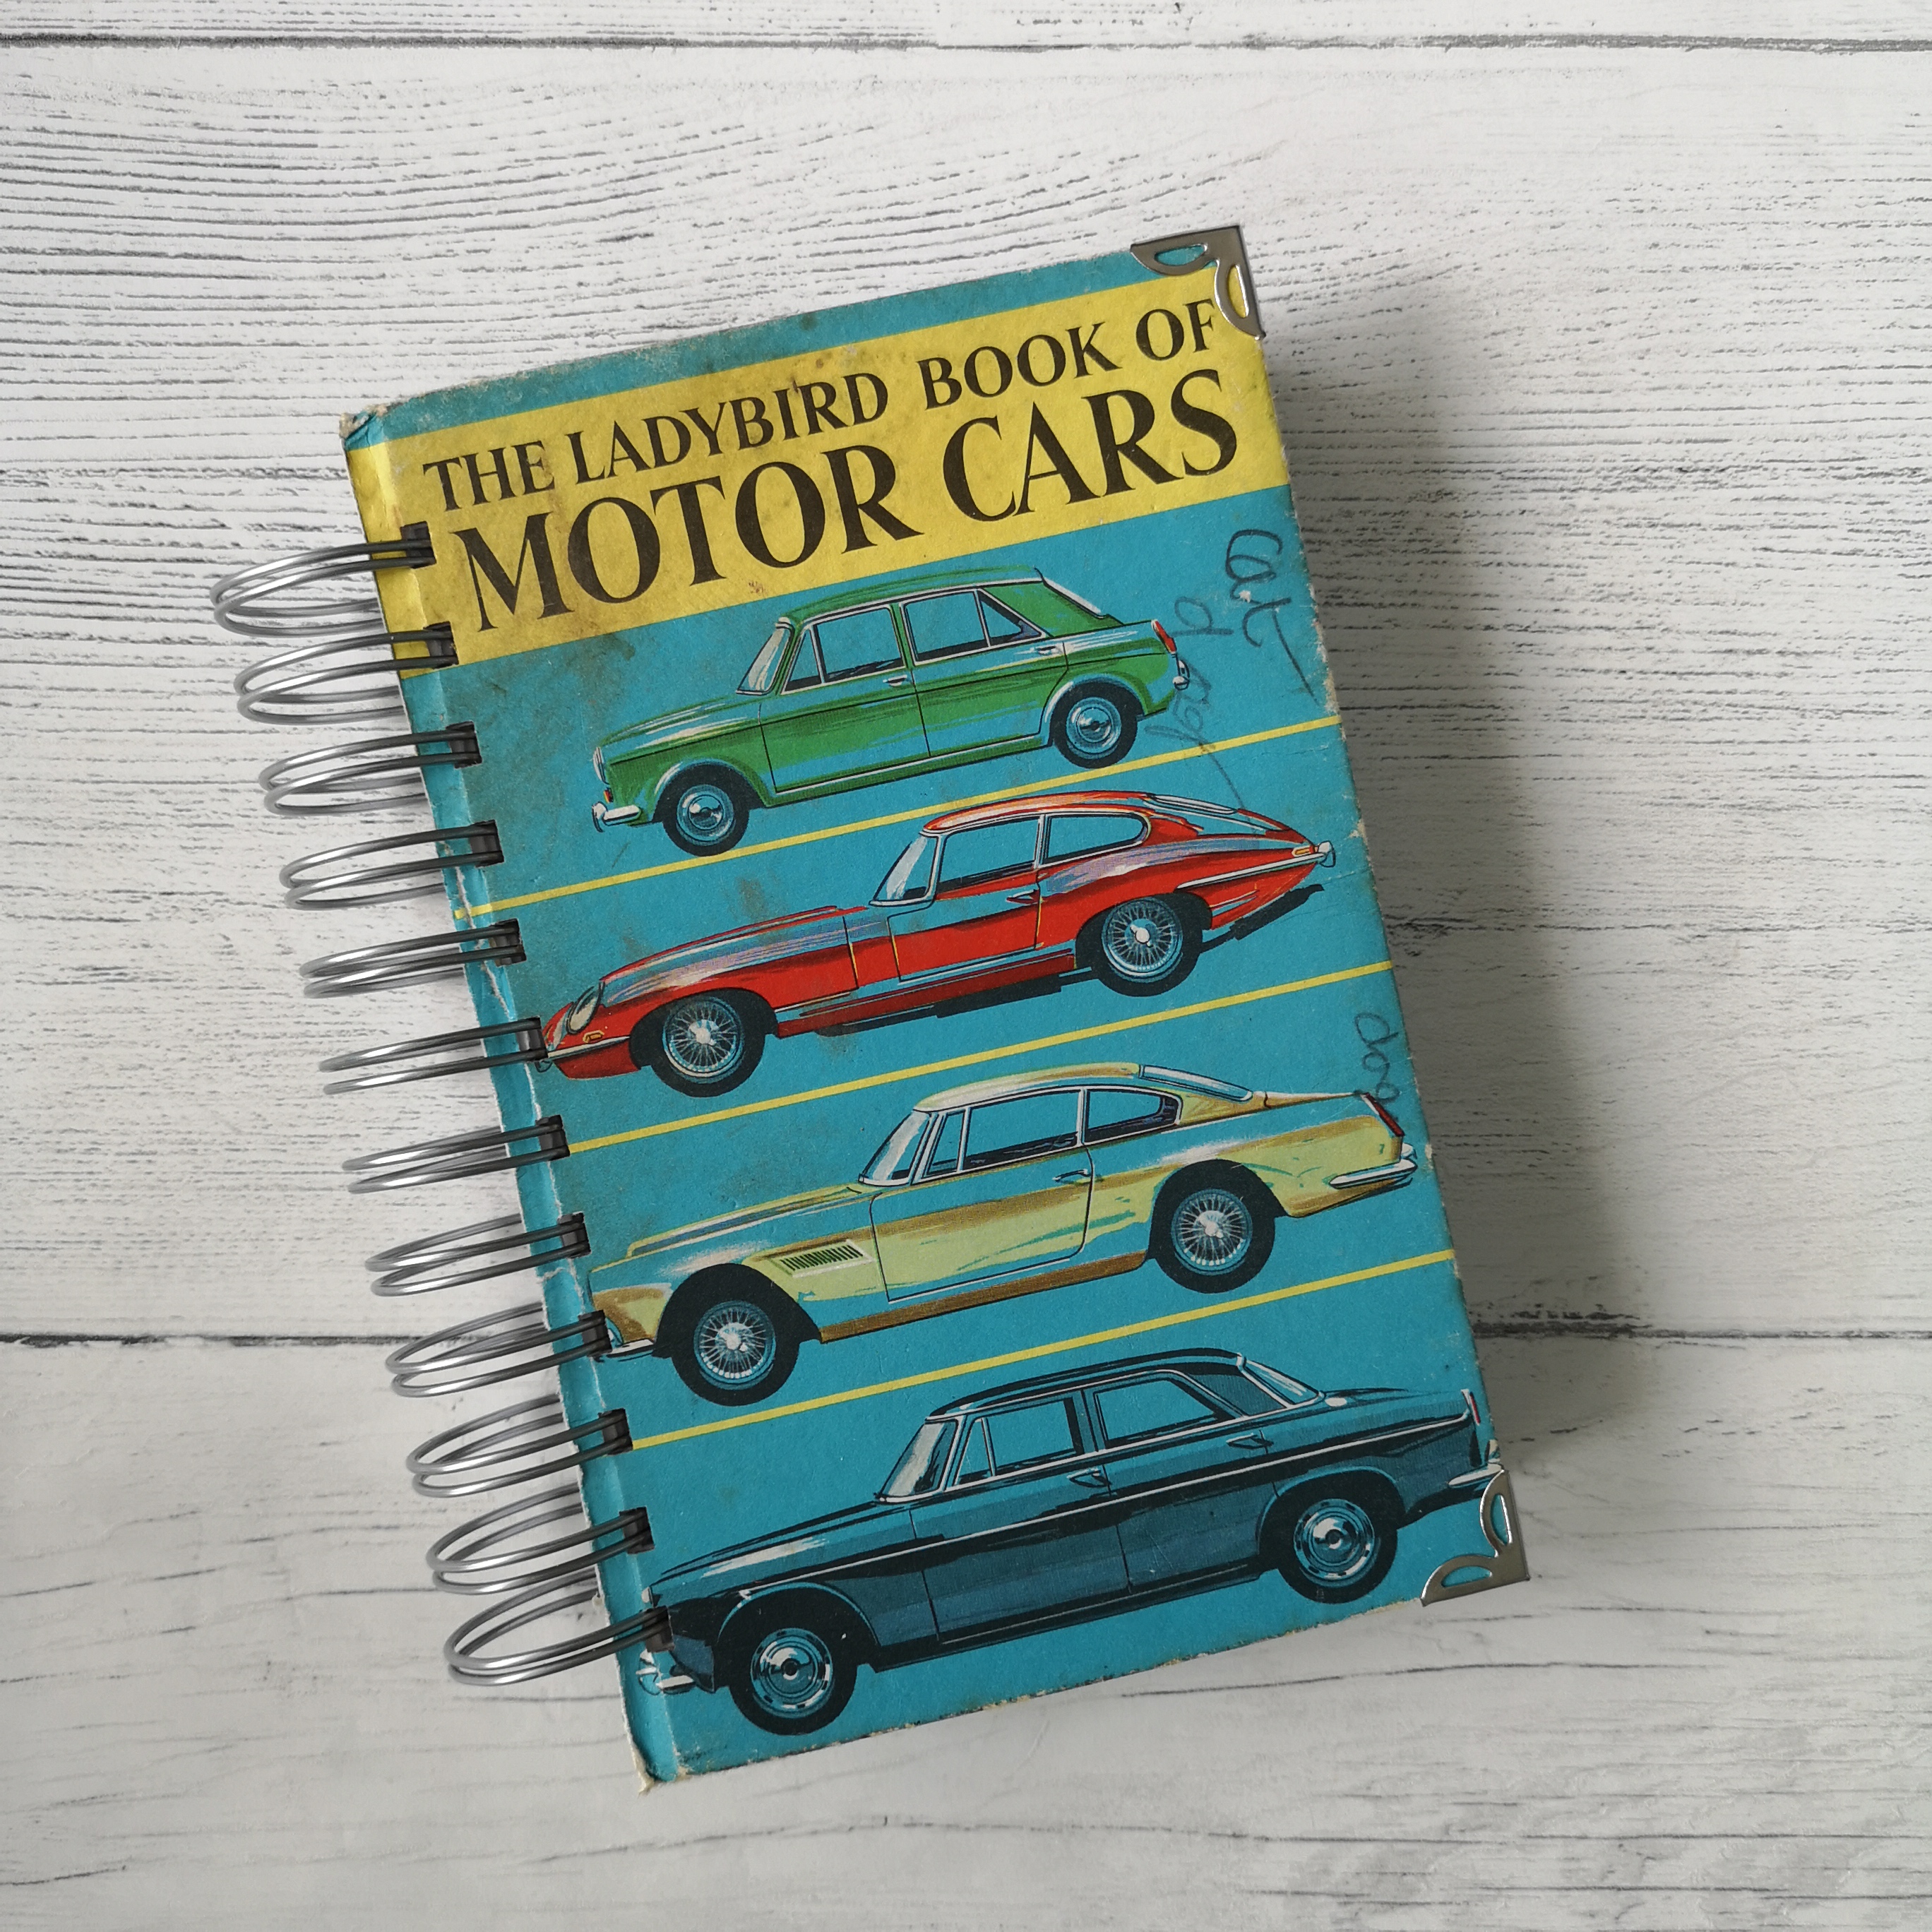
2. Add book corners.

The corners are a really vulnerable part of the book and often the first area to show wear. Adding metal corners makes them super strong and keeps your notebook looking neat!

3. Keep them clean.

If you have a plastic coated notebook, apply some antibacterial spray (I like to use a very diluted Zoflora) to a cloth and gently wipe over your notebook cover. Never spray the book, and don’t attempt this on a paper / matt cover!

4. Don’t stick a pen in the spine!

I know it’s so easy to do, and convenient but the pen can bend your notebook wire out of shape and cause even worse damage if you open your book without removing the pen from the spine first!

5. Add a bookband.

My elasticated book bands not only add a bit of sparkle and make my notebooks look pretty, but they serve a practical purpose. They hold your book together, preventing it from opening in your bag and getting damaged. And they can also be used as a handy bookmark!

It is of course inevitable that your notebook will eventually come to an end when you’ve used up all the paper. My top tip? Buy another one!

Becky x

Uncategorized

Ladybird Books are Rubbish!

Instagram can be a wonderful thing! As you know my business is all about recycling and reducing waste. So when I saw on Instagram last month, that Linzi Loves Books was throwing away some of her Ladybird Book collection – I was quick to ask if I could have her old covers.

A little note from Linzi with many wonderful covers which so many of us would have read when we were little

I’ve been following Linzi for some time on IG and she has thousands of Ladybird Books in her collection now, so much so she can afford to get rid of doubles, and the ones that are so damaged they’re not worth anything. (To collectors at least…)

She had removed the original papers from the books to use for paper crafts but the covers were destined for the bin. She didn’t know if I would be able to save any, but we both thought it was worth a try, so I paid the postage and she kindly sent them over.

Amazingly there were very few that I had to get rid of. The rest, although well loved, will make fantastic notebooks and are available to buy from my online shop, now.

Some of them needed a bit more love than others. For example this Little Red Hen book had an unfortunate sticker on the front cover (often the cause of damage for old ladybird books – charity shops are a nightmare!) however I was overjoyed at successfully removing it!

Before…
After… it is the same book, promise!

Let’s face it, we all love Ladybird Books and I think Lawrence Zeegan, author of Ladybird by Design, explains it perfectly: “A Ladybird book evokes strong feelings; deep-rooted memories of a time and a place when a simply designed and cheaply produced book could resonate across generations of readers.”

These books have passed through many generations, and it’s a lovely thought to know they can get a new lease of life as a notebook. As they are a little extra worn and don’t have their original pages, they are just £4 each. (Instead of £6) I have also added a drop down menu on the shop listing if you would like to add metal book corners for an additional £1.

Here’s one I made earlier…

They can be purchased with any of the upgrades from my shop; so they could come with lines, or as an address book, a diary etc.. just add the upgrade to your basket before you checkout.

There are so many things you can make with vintage book paper…

And if you fancy a bit of recycling yourself, you can purchase bundles of leftover paper from my notebooks to make all sorts of wonderful things. I hope to show you some craft ideas in future blogs -watch this space!

Uncategorized

Finding one’s marbles…

Last Sunday I took part in a marbling workshop at the Baytree Shopping Centre in Brentwood. Amazingly, it was a FREE workshop provided by the Brentwood Art Trail.

The last time I tried marbling was when I was at school. We did it A LOT! So much so it wasn’t hard to find some that I did when I was 7 years old…

It’s not about the dragon…

My love for old books means you often find marbled paper inside them, or on the page edge. And when I did a book binding course a few years ago at the Essex Record Office, we got to work with some beautiful marbled paper as you can see here.

I loved using this marbled paper to make my notebook.

The workshop didn’t disappoint. Run by Julie (@ladyvermillion on IG) she showed us some of the examples she had made and briefly explained what we needed to do.

The equipment is simple so you can easily have a go yourself at home. You just need a washing up bowl or tray of water, some nail varnish and some things to marble.

This is a brilliant way of using up old nail varnishes – I know I’ve got some stored away – random colours that seemed like a good idea at the time! All you have to do is pour the nail varnish onto the water surface – that’s the important bit, getting it on the surface, not dropping to the bottom of the bowl. I found the easiest way to do it was to pour close to the surface rather than at a height and to wave the bottle friskly!

It can get messy so gloves, apron and newspaper are a good idea!

It was very much a case of trial and error. Waiting for the paint to disperse definitely gave a more ‘natural’ marbled look, but, left too long and it would set on the water and not adhere as well. (Some peeled off my paper)

The concentration….

More paint gave brighter images, I tried some swirling with a wooden stick to create some patterns, but again speed was the key, if I wasn’t quick enough I found myself collecting the paint onto the stick.

However the stick method was handy for cleaning the water surface when you wanted to change colours. You could just push the excess paint to the side of the bowl and start a fresh, no need to change the water each time.

I mostly marbled on watercolour paper as I liked the texture – but being absorbent it did take longer to dry! I also marbled a glass jar which dried really quickly, it’s now a pen pot!

We were each given a notebook and the idea was to make a bookmark from our marbled paper at the workshop but we ran out of time with the drying so I waited until I got home to decorate my notebook and used the left over paper to make my bookmark.

I really like the swirls on the bookmark.

I left feeling eager to marble more! Although I love the idea of using up old nail varnishes, I think using a marble kit may be better for creating the papers that I would like. I was going to say they’d probably be more predictable but I don’t think marbling can ever be predictable and that’s the whole point, you never know what you’re going to create!

Some of my other work made from the workshop

If you’ve thought about marbling, I hope that maybe you might like to give it a go now. It’s so simple, and if you’re after inspiration on things to marble, just have a look on Pinterest! And if you make anything – I’d love to see it so please share and tag me in!